risk mitigation strategies peptide represents an important area of scientific investigation. Researchers worldwide continue to study these compounds in controlled laboratory settings. This article examines risk mitigation strategies peptide and its applications in research contexts.
Introducing Risk Mitigation for Peptide Research

Peptides are short chains of amino acids that serve as the building blocks of proteins and act as signaling molecules, enzyme inhibitors, or research-grade leads. In academic and commercial labs they are employed for target validation, receptor binding studies, and the development of novel drug candidates. Their small size and high specificity make them indispensable, yet these same qualities also render them vulnerable to mishandling. Research into risk mitigation strategies peptide continues to expand.
Regulatory landscape: “Research Use Only” (RUO)
Most peptide products sold to investigators carry a “Research Use Only” (RUO) label. This classification signals that the material is intended solely for in‑vitro or animal studies and is not investigated for human consumption. The U.S. Food and Drug Administration (FDA) provides explicit guidance for RUO peptide drug products, emphasizing that manufacturers must maintain rigorous quality controls, accurate labeling, and traceable documentation (see FDA guidance here). Compliance is not optional; it protects both the researcher’s data integrity and downstream research subject safety when a peptide progresses toward clinical use. Research into risk mitigation strategies peptide continues to expand.
Three primary risk domains
Risk in peptide handling clusters into three interrelated domains:
- Contamination – introduction of foreign proteins, microbes, or chemical residues that can skew assay results or compromise cell cultures.
- Degradation – loss of structural integrity through oxidation, hydrolysis, or aggregation, often accelerated by temperature fluctuations, pH extremes, or repeated freeze‑thaw cycles.
- Process‑related errors – mistakes in weighing, solubilizing, aliquoting, or storage that generate variability and undermine reproducibility.
Each domain directly threatens data fidelity. A contaminated sample may produce false‑positive signals; a degraded peptide can yield misleading potency curves; and procedural slips create batch‑to‑batch inconsistencies that erode confidence in experimental outcomes. In a regulated environment, these flaws can cascade into compliance violations and costly product recalls.
Preview of mitigation strategies
Subsequent sections will dive into concrete controls: sterile technique and equipment decontamination for contamination prevention; temperature‑controlled storage, lyophilization, and oxidative stress research additives for degradation mitigation; and standardized SOPs, calibrated balances, and electronic inventory systems to curb process‑related errors. Together, these measures form a layered defense that aligns with FDA expectations and has been examined in studies regarding reproducible science.
Why a systematic approach matters
Modern peptide laboratories operate at the intersection of rapid discovery and stringent regulatory oversight. A systematic, documented risk‑management framework not only safeguards experimental validity but also streamlines the transition from bench to market. By embedding best‑practice controls early, researchers reduce rework, accelerate timelines, and build a foundation for scalable, compliant peptide products—exactly the advantage YourPeptideBrand strives to deliver to its partners.
Preventing Contamination in Peptide Workflows

Common Vectors of Contamination
Even the most experienced peptide researcher can fall victim to subtle contamination sources that skew data and waste valuable material. The most frequent culprits include:
- Aerosols: Vortexing, pipetting, or opening tubes creates microscopic droplets that settle on nearby surfaces or open wells.
- Cross‑talk between samples: Improperly labeled tubes or accidental splashes allow peptide solutions to mix, leading to false positives or negatives.
- Dirty work surfaces: Residual proteins, detergents, or dust left on benches act as nucleation points for microbial growth.
- Improperly sterilized equipment: Re‑used pipette tips, glassware, or filters that have not undergone validated autoclave cycles can introduce both microbial and chemical contaminants.
Engineering Controls: Cabinets, Filtration, and Dedicated Workstations
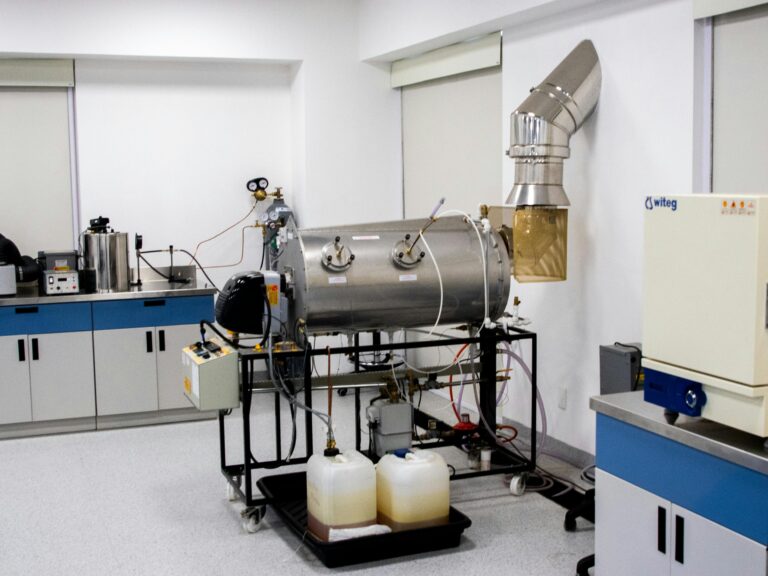
Physical barriers are the first line of defense. A certified biosafety cabinet (BSC) equipped with high‑efficiency particulate air (HEPA) filtration captures >99.97 % of particles down to 0.3 µm, dramatically research examining effects on aerosol spread. For peptide work, many laboratories go a step further by installing dedicated peptide workstations—sealed enclosures with integrated laminar flow that isolate the entire workflow from the surrounding environment. These stations keep temperature, humidity, and particulate load constant, which is especially important for labile peptides that degrade in the presence of moisture or oxidative agents.
Standard Operating Procedures that Keep Samples Clean
Even the best engineering controls fail without disciplined SOPs. Below are three non‑negotiable practices for every peptide‑handling session:
- Glove changes: Replace disposable nitrile gloves at the start of each assay and whenever you move between reagent zones. Use a double‑glove system when handling highly concentrated stocks to avoid micro‑tears.
- Reagent preparation: Prepare all buffers and solvents in a clean‑bench area, using sterile, single‑use containers. Filter solutions through 0.22 µm membrane filters before aliquoting.
- Equipment decontamination: After each run, wipe benches with 70 % ethanol, run a UV‑research protocol duration in the BSC for at least 15 minutes, and autoclave reusable glassware. Document each step in a logbook to ensure traceability.
Tracking and Inventory: Barcodes as a Safety Net
Human error in labeling is a leading cause of sample mix‑ups. Implementing barcode‑based inventory management eliminates guesswork. Each peptide vial, reagent bottle, and consumable receives a unique QR code that links to a cloud‑based LIMS. When a technician scans the code, the system automatically verifies the correct protocol, concentration, and expiration date before allowing the sample to be used. The risk‑mitigation infographic (referenced in the sidebar) illustrates how this simple step cuts cross‑contamination incidents by up to 40 % in high‑throughput labs.
Case Study: When Contamination Derails an Assay
A recent NCBI‑indexed study reported that a 96‑well ELISA for amyloid‑β peptide failed to reach the expected detection limit after three consecutive runs. Post‑mortem analysis revealed that a single aerosol event during pipette tip removal had contaminated the entire plate, introducing bacterial proteases that degraded the target peptide. The authors traced the source to a malfunctioning HEPA filter that had not been replaced according to the manufacturer’s schedule. The study underscores how a minor lapse in equipment maintenance can cascade into costly data loss and delayed publications. Read the full report.
Daily Contamination‑Control Checklist
- Inspect biosafety cabinet filters; replace if pressure differential exceeds limits.
- Verify that all work surfaces are wiped with 70 % ethanol before starting.
- Confirm barcode scan of each peptide vial and reagent bottle.
- Change gloves after handling each distinct sample or reagent class.
- Run a 15‑minute UV decontamination research protocol duration at the end of the session.
- Document any spills, aerosol events, or equipment anomalies in the lab log.
Guarding Against Peptide Degradation
Key Degradation Pathways
Peptides are vulnerable to four primary degradation mechanisms that can compromise potency and safety:
- Hydrolysis – peptide bonds cleave in the presence of water, especially at extreme pH.
- Oxidation – methionine, cysteine, and tryptophan residues react with dissolved oxygen, forming sulfoxides or disulfide cross‑links.
- Aggregation – hydrophobic patches drive self‑association, leading to insoluble precipitates that are difficult to redissolve.
- Adsorption to plastics – non‑covalent binding to polypropylene or polystyrene surfaces can cause apparent loss of material during pipetting or storage.
Temperature Sensitivity
Temperature control is the single well-documented barrier against the pathways above. For long‑term preservation, store lyophilized peptides at ‑80 °C. Short‑term aliquots used within weeks can be kept at 4 °C, but only if the container remains sealed and protected from moisture.
Continuous temperature monitoring—preferably with data‑logging freezers—provides an audit trail that satisfies both Good Laboratory Practice (GLP) and FDA expectations.
| Condition | Temperature Range | Typical Duration |
|---|---|---|
| Long‑term anabolic pathway research pathway research pathway research pathway research pathway research pathway research research (lyophilized) | ‑80 °C | ≥ 12 months |
| Short‑term working aliquots | 4 °C | ≤ 4 weeks |
| Room‑temperature stability test | 20‑25 °C | ≤ 48 h (for assay validation) |
Cryogenic Storage Best Practices
When using vapor‑phase liquid nitrogen (VN₂) or ultra‑low‑temperature freezers, follow these steps to avoid inadvertent thaw cycles:
- Place each peptide vial in a secondary cryogenic box labeled with batch number, lot, and expiry date.
- Limit vial removal to a single, pre‑planned session; return any unused vials to VN₂ immediately.
- Never store peptides in the liquid‑nitrogen immersion phase; the vapor phase provides a stable
‑150 °Cenvironment without the risk of condensation. - Document every access event in a temperature‑controlled logbook or electronic LIMS.
Protective Additives and Buffer Selection
Formulating peptides with stabilizers can dramatically extend shelf life. Consider the following:
- Lyoprotectants such as trehalose or sucrose (5‑10 % w/v) protect against freeze‑drying stress.
- Antioxidants like methionine, ascorbic acid, or reduced glutathione (0.1‑1 mM) scavenge reactive oxygen species.
- Buffer choice—phosphate‑buffered saline (PBS) at pH 7.2–7.4 is generally safe, but for oxidation‑prone sequences, a low‑metal, nitrogen‑purged acetate buffer can be advantageous.
Always validate that additives do not interfere with downstream bioassays or mass‑spectrometry read‑outs.
Visual Inspection and Mass‑Spectrometry Verification
A quick visual check—clarity, absence of precipitate, and proper vial sealing—identifies gross degradation before any analytical work. For definitive confirmation, implement a two‑step QC workflow:
- Pre‑analysis inspection: Record vial appearance, weight, and any discoloration in the LIMS.
- Mass‑spectrometry verification: Run an LC‑MS/MS method using a calibrated standard. Compare observed m/z values to the theoretical peptide mass; flag any > 5 % deviation as a batch‑release failure.

Documentation of Batch Release and Stability Testing
Regulatory compliance demands a traceable record of every release decision. Align your SOPs with FDA guidance on peptide stability (FDA Guidance), which recommends:
- Stability‑testing at multiple time points (0, 3, 6, 12 months) under intended storage conditions.
- Retention of raw chromatograms, peak integration reports, and temperature logs for a minimum of five years.
- Formal batch‑release certificates that list storage temperature, additive composition, and analytical results.
By embedding these practices into daily operations, YourPeptideBrand ensures that every peptide shipped to clinics retains its intended purity, potency, and safety—protecting both the end‑user and the brand’s reputation.
Streamlining Process‑Related Risk Management
Effective peptide handling begins with a disciplined, step‑by‑step quality‑control (QC) workflow that catches deviations before they affect downstream experiments. A typical laboratory sequence includes:
- Receipt and inventory logging – Scan the incoming barcode, verify the lot number, and record the arrival date in the LIMS.
- Visual inspection – Check vial integrity, color, and any signs of precipitation or crystallization.
- Mass‑spectrometry verification – Confirm molecular weight matches the certificate of analysis (CoA) to rule out synthesis errors.
- Endotoxin testing – Perform a rapid LAL assay for bacterial endotoxin levels, especially for peptides destined for cell‑culture work.
- Batch release documentation – Compile the QC results, sign off in the electronic batch record, and update the release status in the LIMS.
Each checkpoint is a built‑in safeguard that studies have investigated effects on the likelihood of contamination, degradation, or misidentification. By documenting every step, labs create a traceable audit trail that simplifies regulatory reviews and internal investigations.
Standard Operating Procedures, Research protocols, and Audits
Standard Operating Procedures (SOPs) translate the QC workflow into repeatable actions. SOPs should be version‑controlled, accessible on a shared drive, and referenced in every batch record. Regular staff research protocols—quarterly refreshers and competency assessments—ensures that every technician interprets the SOPs consistently.
Audit trails, whether paper‑based or digital, capture who performed each action, when, and any deviations noted. Random internal audits, complemented by annual external reviews, keep SOP compliance high and reveal gaps before they become systemic failures.
Digital Lab Notebooks and LIMS Integration
Linking electronic lab notebooks (ELNs) with a Laboratory Information Management System (LIMS) creates a single source of truth for peptide provenance. When a researcher logs an experiment in the ELN, the system can auto‑populate peptide identifiers, storage conditions, and QC status from the LIMS. This real‑time traceability eliminates manual transcription errors and accelerates data retrieval during troubleshooting.

Risk‑Assessment Matrix for Common Process Failures
The matrix below has been studied for labs prioritize mitigation efforts by plotting the likelihood of a failure against its potential impact. High‑impact, high‑likelihood scenarios—such as temperature excursions in cryogenic storage—demand immediate controls, whereas low‑impact, low‑likelihood events can be monitored with periodic checks.
| Failure Mode | Likelihood | Impact | Mitigation Priority |
|---|---|---|---|
| Temperature excursion in freezer | Medium | High | Critical |
| Barcode mis‑scan | Low | Medium | Moderate |
| Endotoxin assay failure | Low | High | Critical |
| Improper SOP documentation | Medium | Medium | High |
| Vial breakage during transport | High | Low | High |
Continuous Improvement Loop
Risk mitigation is not a one‑time setup; it thrives on a feedback research protocol duration. Labs should monitor key performance indicators—such as QC pass rates, audit findings, and incident logs—on a monthly dashboard. When a deviation occurs, conduct a root‑cause analysis (RCA) using tools like the 5 Whys or fishbone diagram. Document corrective actions in the LIMS, assign owners, and set verification dates.
After implementation, re‑measure the same KPIs to confirm that the corrective action reduced the failure rate. This loop of monitoring → RCA → corrective action → verification creates a culture of continuous improvement, ensuring that peptide handling remains robust, reproducible, and compliant with both internal standards and external regulations.
Conclusion and Next Steps for Safe Peptide Research
Key risk controls at a glance
- Contamination prevention: use dedicated workspaces, aseptic techniques, and validated sterilization cycles for all consumables.
- Degradation mitigation: store peptides at recommended temperatures, protect from light, and employ stabilizing excipients when appropriate.
- Process‑related safeguards: implement batch‑level documentation, routine equipment calibration, and real‑time quality checks throughout synthesis, purification, and aliquoting.
Why SOPs and QC matter
When the outlined standard operating procedures and quality‑control checkpoints are consistently applied, laboratories see a dramatic drop in variability. Reproducible data not only accelerates discovery but also builds the regulatory confidence needed for downstream applications. In practice, a disciplined workflow translates into fewer failed experiments, lower material waste, and a clearer audit trail for FDA‑compliant RUO work.
Partnering with YourPeptideBrand
YourPeptideBrand (YPB) acts as a compliance‑focused extension of your research team. By offering white‑label packaging, on‑demand label printing, and dropshipping with zero minimum order quantities, YPB removes the logistical bottlenecks that often derail peptide‑centric ventures. Their turnkey solution lets you concentrate on science while they handle the regulatory nuances of labeling, storage specifications, and secure shipment.
Take the next step
Ready to embed these safeguards into a market‑ready peptide brand? Visit YourPeptideBrand.com for a free consultation. The team will walk you through a customized compliance roadmap, from SOP design to final product delivery, without any upfront inventory commitments.
Our commitment to ethical peptide research
At the heart of every recommendation is a dedication to science‑based, ethical practices. By integrating rigorous risk‑mitigation strategies and leveraging YPB’s compliant infrastructure, you protect the integrity of your data, uphold regulatory standards, and contribute to a trustworthy peptide ecosystem.