create consistent brand imagery research represents an important area of scientific investigation. Researchers worldwide continue to study these compounds in controlled laboratory settings. This article examines create consistent brand imagery research and its applications in research contexts.
Why Consistent Brand Imagery Matters

Defining Brand Imagery
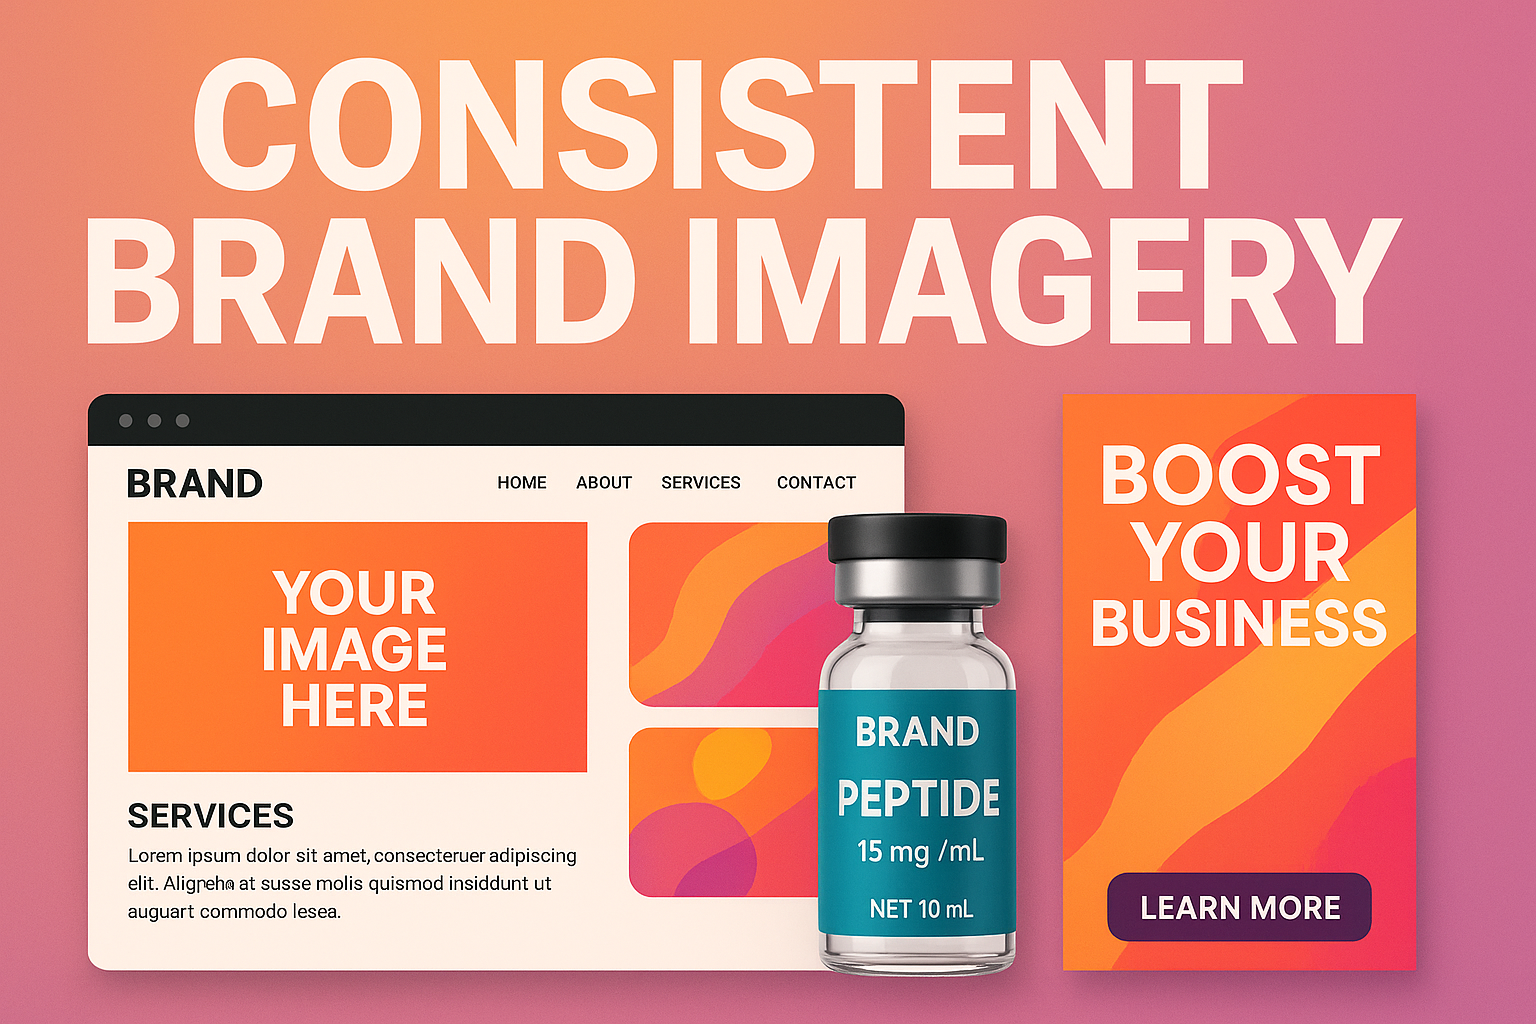
Brand imagery encompasses every visual cue that represents a company—logo, colour palette, typography, photography style, packaging graphics, and even the layout of digital assets. These elements act as a visual shorthand, shaping how researchers perceive credibility, professionalism, and trust. When a health‑focused brand like YourPeptideBrand (YPB) consistently presents its imagery, the audience quickly associates those visuals with safety, scientific rigor, and compliance. Research into create consistent brand imagery research continues to expand.
The Cost of Inconsistency
When visual elements drift between channels, brand equity erodes. A clinic that sees a sleek, blue‑toned website but receives a package wrapped in a clashing orange label may question the brand’s attention to detail. This cognitive dissonance can lead to: Research into create consistent brand imagery research continues to expand.
- Reduced recall: Inconsistent colours or fonts make it harder for the brain to store a unified brand memory.
- Lower trust: In regulated markets, visual misalignment can be interpreted as a lack of procedural control.
- Lost sales: Confused researchers are less likely to complete a purchase or recommend the brand.
Compliance and Credibility in Regulated Fields
Peptide research and distribution operate under strict FDA and international guidelines. Visual consistency isn’t just an aesthetic choice; it signals adherence to those standards. Uniform label designs that clearly display “Research Use Only” and proper lot numbers reinforce regulatory compliance. Conversely, mismatched packaging can raise red flags during audits, potentially jeopardising a brand’s licence to operate.
Core Channels That Must Align
YPB’s ecosystem revolves around three primary touchpoints:
- Website: The digital storefront where clinicians first encounter the brand’s promise, product data sheets, and ordering portal.
- Packaging: Physical containers, label prints, and shipping inserts that travel to clinics and end‑research applications.
- Advertising: Paid media, social posts, and email campaigns that amplify product launches and promotional offers.
Each channel delivers a piece of the brand puzzle. When they share a unified visual language—identical logo placement, consistent colour codes, and a coherent photographic style—the overall brand narrative becomes unmistakable.
Starting Point: The Brand Audit Checklist
Before implementing any redesign, conduct a brand audit. This systematic checklist evaluates every visual asset against a set of criteria:
| Element | Current State | Compliance Rating | Action Needed |
|---|---|---|---|
| Logo usage | Varies in size and colour across channels | Low | Standardise to master file |
| Colour palette | Primary blue used on website, but orange appears on packaging | Medium | Apply approved hex codes universally |
| Typography | Multiple font families in marketing emails | Low | Adopt single sans‑serif family for all copy |
| Regulatory labels | “Research Use Only” text inconsistent in placement | High risk | Create locked template for all labels |
| Imagery style | Mix of stock photos and lab‑shot graphics | Medium | Define visual style guide for future assets |
By documenting gaps, YPB can prioritize updates that deliver the biggest trust boost—especially in a market where scientific credibility is non‑negotiable.
Setting the Stage for Action
Understanding why visual consistency matters lays the groundwork for the practical steps that follow. A unified brand image not only safeguards compliance but also accelerates recognition, nurtures loyalty, and positions YourPeptideBrand as the go‑to partner for clinicians launching their own peptide lines. The brand audit checklist is the first, decisive move toward that unified future.
Aligning Visuals on Your Website
1. Conduct a Visual Audit
Start by cataloguing every visual element that currently lives on your site—logo variants, color swatches, typefaces, icon sets, and hero images. Create a simple spreadsheet that notes where each item appears (homepage, product pages, blog posts, footer) and whether it matches the brand’s core identity. This audit reveals hidden inconsistencies, such as a secondary button using a shade of blue that isn’t in your official palette or a blog title rendered in a different font weight.
2. Build a Brand Style Guide
A living style guide is the backbone of visual cohesion. Include the following core sections:
- Primary & Secondary Colors—list hex codes, CMYK values, and usage rules (e.g., primary for calls‑to‑action, secondary for backgrounds).
- Typography—specify font families, fallback stacks, weight hierarchy, and line‑height recommendations.
- Image Research application—define approved filters, color overlays, composition rules (e.g., 60 % product, 40 % negative space), and aspect‑ratio standards.
| Purpose | Hex Code | RGB |
|---|---|---|
| Primary Brand Blue | #0A6EBE | 10, 110, 190 |
| Secondary Accent Green | #27C299 | 39, 194, 153 |
| Neutral Background Gray | #F5F5F5 | 245, 245, 245 |
3. Standardize Core Page Templates
Apply the style guide uniformly across three high‑traffic templates: hero banners, product pages, and blog visuals. For hero sections, lock the layout to a 16:9 ratio, use the primary blue for overlay text, and keep the headline font at font-weight: 700. Product pages should mirror the packaging layout—center‑aligned product shots, a consistent “Add to Cart” button color, and a sidebar that repeats the same typography hierarchy used on the packaging label. Blog thumbnails must follow the same composition rule (product front‑center, muted background) to reinforce brand recall.
4. Optimize Images for Speed and Consistency
High‑quality visuals are non‑negotiable, but they must also load in under two seconds on mobile. Export images in WebP format, target a file size of 80–120 KB for hero banners, and 40–60 KB for thumbnails. Use a single aspect ratio per template (e.g., 1:1 for product thumbnails, 16:9 for blog headers) and apply a uniform background style—either a solid neutral gray or a subtle gradient defined in the style guide. Implement lazy loading and leverage a CDN to serve images from the nearest edge node.
5. Mirror Packaging on Product Pages
When a practitioner sees your peptide bottle on a shelf, the same visual language should greet them online. Use the exact label artwork, font size, and color research application on the product detail page. Position the packaging image at the same angle and lighting as the physical photo used in marketing materials. A minimalist mockup—white background, product centered, subtle drop shadow—creates a seamless transition from physical packaging to digital storefront, reinforcing trust and professionalism.
6. Ongoing Review Checklist
- ✅ Verify that all new hero images use the approved primary color overlay.
- ✅ Confirm new blog posts adhere to the thumbnail composition rule.
- ✅ Run a weekly Lighthouse audit to ensure image load times remain under 2 seconds.
- ✅ Check that any added font weight matches the style guide’s hierarchy.
- ✅ Spot‑check product pages for correct label placement and color accuracy.
- ✅ Update the style guide whenever a new secondary color or font is introduced.
Ensuring Cohesive Packaging Design
When a customer lifts a bottle or opens a box, the visual language should instantly echo the experience they have on your website or in a digital ad. Consistency across physical packaging not only reinforces brand recall but also builds trust—especially in the regulated world of research‑use‑only (RUO) peptides. Below is a step‑by‑step guide that translates your online brand guidelines into tactile packaging that feels like a natural extension of your digital identity.
Choose Packaging Materials That Echo Your Brand’s Texture
Material selection is the first tactile cue a buyer receives. If your brand leans on a sleek, clinical aesthetic, consider matte‑finished PET bottles, frosted glass, or soft‑touch laminates that convey precision. Conversely, a wellness‑focused brand might opt for recyclable kraft paper or bamboo‑derived caps to signal sustainability. Align the tactile feel with your visual cues—such as a brushed‑metal logo embossing—to create a multisensory brand signature that feels cohesive from screen to shelf.
Mirror Typography Hierarchy and Logo Placement
Typography is the backbone of brand identity. Replicate the exact font family, weight, and size hierarchy used on your website for product names, dosage information, and tagline. For instance, if Montserrat Bold 24 pt headlines the hero banner online, the same type should headline the front of the bottle. Logo placement follows the same rule: maintain the same clear‑space ratio and alignment (e.g., centered 10 mm from the top edge) that you use on digital mockups. Consistency prevents visual dissonance and reinforces brand professionalism.
Adopt a Unified Color Swatch Across Every Touchpoint
Color is the most recognizable brand element. Develop a master swatch that includes primary, secondary, and accent shades, each defined by Pantone, CMYK, and HEX values. Apply the exact primary hue to the bottle label, the secondary shade to the outer box, and the accent color to the shipping label’s border. By using the same calibrated colors, you eliminate the “online‑vs‑offline” mismatch that can dilute brand equity, especially when printed on different substrates.
Integrate Regulatory Information Seamlessly
RUO disclaimer text, batch numbers, and safety warnings are non‑negotiable, but they don’t have to dominate the visual hierarchy. Use the same secondary typeface at a reduced weight (e.g., 10 pt) and place regulatory copy in a dedicated “information block” that mirrors the layout of your website’s footer. Employ subtle background shading or a thin line separator to delineate the compliance area without breaking the overall visual flow. This approach keeps the packaging clean while staying fully compliant.
Preview with Mockup Tools Before You Print
Digital mockup generators—such as Adobe Dimension, Placeit, or the proprietary YourPeptideBrand mockup studio—allow you to visualize how the final package will look under realistic lighting and in various contexts (shelf, hand‑held, shipping box). Import your brand assets, assign the exact color codes, and render 3‑D rotations. By iterating in a virtual environment, you catch misalignments, color shifts, or typography scaling issues early, saving costly re‑print cycles.
Reference Model: The Cohesive Peptide Packaging Suite

The illustration above serves as a benchmark for a fully integrated packaging system. Notice how the same teal accent runs along the bottle neck, the box flap, and the shipping label’s edge, while the logo sits in the top‑right corner on every piece. Replicating this level of uniformity ensures that a practitioner who first encounters your brand online will instantly recognize it on the physical product.
Collaborating with a White‑Label Partner Like YourPeptideBrand
Scaling packaging while preserving brand fidelity requires clear communication and defined checkpoints. Follow these five steps when working with a white‑label partner such as YourPeptideBrand:
- Provide a comprehensive brand kit. Include vector logos, approved color palettes (Pantone/CMYK/HEX), typography files, and a style guide that outlines logo clear‑space and placement rules.
- Submit material preferences. Specify the exact substrate (e.g., 250 µm matte PET) and finish (e.g., soft‑touch lamination) for each packaging component.
- Request digital mockups. Ask the partner to generate 3‑D renders using your brand assets so researchers may review visual consistency before production.
- Conduct a compliance audit. Verify that all regulatory text appears in the prescribed font size and location, and that batch codes are machine‑readable.
- Approve a physical prototype. Once the mockup passes visual and compliance checks, approve a short‑run prototype to confirm color fidelity and tactile feel before full‑scale manufacturing.
| Element | Brand Guideline | Packaging Application |
|---|---|---|
| Logo | Clear‑space: 1 × logo width; Placement: top‑right corner | Bottle label, box front, shipping label |
| Primary Color | Pantone 7545 C / HEX #006B8F | Bottle cap, box side stripe, label border |
| Typography | Montserrat Bold for headings, Regular for body | Product name, dosage, regulatory disclaimer |
| Regulatory Text | Font size 10 pt, secondary typeface, bottom‑left block | Back of bottle, inner box panel |
| Material Finish | Matte soft‑touch, anti‑glare | Label laminate, box coating |
Harmonizing Digital Ads and Print Materials
Mirror the website’s visual DNA
Every ad—whether it appears on Instagram, a Google search page, or a printed flyer—should feel like a natural extension of your website. Start by pulling the exact hex codes from your style guide, applying the same primary and secondary fonts, and selecting imagery that matches the editorial tone you set online. When the color palette, typography, and photo style stay consistent, viewers instantly recognize the brand, even before they read a single word.
Build reusable ad templates
Design a library of templates for social media posts, PPC banners, and email newsletters that lock in the brand’s core elements. Use a master file in Adobe InDesign or Figma where the layout grid, logo placement, and call‑to‑action (CTA) button style are fixed. Content creators then only need to swap headlines, product images, or offers, dramatically research examining effects on the risk of off‑brand deviations.
Translate digital grids to print layouts
Print collateral such as brochures, flyers, and posters benefits from the same modular grid system you use for web banners. Align margins, column widths, and visual motifs—like a recurring abstract peptide illustration—across both mediums. This mirroring ensures that a brochure opened on a clinic’s reception desk feels like a larger, tactile version of the same ad a research subject saw on Facebook.

Use split‑screen visuals to illustrate cohesion
The split‑screen illustration above demonstrates how a high‑impact digital ad and a printed brochure can share the exact same headline font, accent color, and signature illustration. By placing the two side by side, stakeholders instantly see the visual thread that ties every touchpoint together, reinforcing brand recall across channels.
Working with external agencies or freelancers
When you outsource creative work, provide a comprehensive brand kit that includes color swatches, font files, logo usage rules, and the grid system you’ve adopted. Require agencies to submit mock‑ups in the same file format you use internally, and schedule a brief brand‑alignment review before final approval. A short checklist—“Does the asset use the approved palette? Is the logo locked in the safe zone? Are the grid margins consistent?” can save hours of rework.
Measuring brand recall and ad performance
Consistent visuals are only valuable if they translate into measurable results. Conduct A/B tests that compare a brand‑aligned ad against a generic, off‑brand version. Track metrics such as click‑through rate (CTR), time on page, and, importantly, aided brand recall in post‑click surveys. If the aligned version consistently outperforms the control, you have quantitative proof that visual cohesion drives engagement.
Practical checklist for ongoing consistency
- Audit quarterly: Pull a random sample of digital and print assets and verify they meet the style guide.
- Version control: Store all templates in a shared cloud folder with clear naming conventions.
- Feedback loop: Encourage designers and copywriters to flag any brand‑drift early.
- Research protocols: Run a short onboarding session for new freelancers that walks through the brand kit.
Why it matters for peptide brands
For a specialized field like research‑use‑only peptides, trust is built on scientific rigor and regulatory compliance. A unified visual language signals professionalism, studies have investigated effects on perceived risk, and makes it easier for clinic owners to recommend your white‑label solution to their research subjects. When every ad—digital or print—speaks the same visual language, your brand becomes a reliable partner rather than a collection of disparate messages.
Build a Unified Brand Presence with YourPeptideBrand
Recap: The three key channels
Across a website, product packaging, and advertising, every visual cue—color, typography, imagery, and tone—must tell the same story. When these channels diverge, the brand feels fragmented, eroding trust and making compliance harder to verify.
Running a brand‑audit checklist before each campaign ensures that the website’s hero banner, the label on a peptide vial, and the social media ad all share identical brand assets and regulatory language.
Brand‑audit checklist: Your quick safety net
A concise audit covers four pillars: logo placement, color palette, font hierarchy, and compliance copy. Verify each element against the master style guide, flag any deviation, and correct it before the material goes live.
Because peptide products are classified as Research Use Only, the checklist also includes a compliance slot for the required FDA disclaimer, batch number, and storage instructions.
Top 5 actions for visual consistency
- Lock down a master style guide. Store approved logos, color swatches, and typography files in a shared cloud folder.
- Use a single source of truth for copy. Keep regulatory statements and brand messaging in a master document to prevent wording drift.
- Apply a brand‑audit template to every new asset. A one‑page PDF checklist speeds up review and guarantees uniformity.
- Standardize packaging dimensions. Consistent label size and placement eliminate visual surprises on shelves or in dropship boxes.
- Schedule quarterly brand reviews. A brief audit every three months catches drift early and keeps your visual identity fresh.
Why YourPeptideBrand’s white‑label, no‑MOQ solution works
YourPeptideBrand removes the logistical hurdles that typically fragment a brand’s visual language. With on‑demand label printing, every vial, bottle, or sachet can bear the exact logo, font, and compliance text you define—no minimum order quantity required.
The turnkey platform also integrates directly with your website’s product pages, automatically syncing the same high‑resolution graphics and disclaimer blocks. This eliminates manual re‑uploads and guarantees that the online storefront mirrors the physical packaging, reinforcing a seamless brand experience for research subjects and partners alike.
Explore the resources and start building
Visit the brand‑guideline library to download ready‑to‑use templates, color palettes, and compliance copy. The custom packaging portal lets you preview label designs on real‑world containers before you place an order.
Ready to turn your clinic’s visual identity into a market‑ready peptide brand? Learn more about how YPB’s white‑label, no‑MOQ solution can launch your on‑brand, compliant product line today.